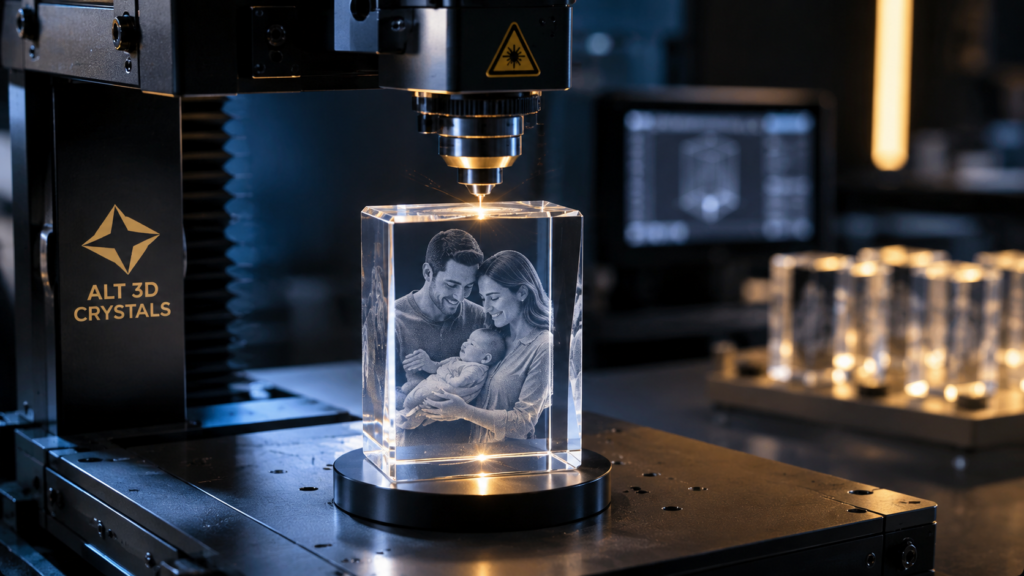
How 3D Crystal Engraving Works: Behind the Scenes at ALT 3D Crystals
Ever wondered how a normal photograph ends up appearing inside a solid piece of crystal?
It may look like magic, but behind every personalized ALT 3D Crystal is a combination of advanced technology, careful image preparation, precision laser engraving and human attention to detail.
Today, we’re taking you behind the scenes to show you how 3D crystal engraving works — from the moment you upload your photo to the moment your finished crystal is ready to be gifted.
From a Photo to Something You Can Hold
It all begins with a photograph.
It might be a wedding photo, a family memory, a favorite picture of your pet, a graduation moment or an image of someone you never want to forget.
Once the photo is submitted, the transformation begins.
Our goal isn’t simply to place an image on a piece of crystal.
We create a visual that appears inside the crystal, giving the photograph depth and turning an everyday image into a display piece made to last.
Step 1: Preparing Your Photo
Before the crystal ever reaches the engraving machine, the photograph has to be prepared.
Our team reviews the image and focuses on the details that matter most, including:
- Faces and expressions
- Important features
- Subject positioning
- Background distractions
- Overall composition
Depending on the photograph, unnecessary background elements may be removed or adjusted so the main subject becomes the focus of the finished 3D photo crystal.
This preparation stage is one of the most important parts of creating a great result.
Step 2: Creating the 3D Effect
A normal photograph is two-dimensional.
To produce the signature dimensional appearance found inside a personalized 3D crystal, the image must first be processed specifically for crystal engraving.
The photograph is prepared to create depth and dimension so that, once engraved, the subject appears to sit within the crystal rather than simply being printed onto its surface.
This is what gives a 3D crystal its distinctive appearance when viewed from different angles.
Step 3: Inside the 3D Crystal Laser Machine
Now comes the part most people never get to see.
The prepared design is sent to our 3D crystal laser engraving machine.
Instead of printing ink onto the crystal or engraving only its exterior surface, precision laser technology creates extremely small points within the crystal itself.
Together, these points form the image.
The result is an engraving that appears suspended inside solid crystal.
No ink. No sticker. No photograph glued inside.
The image is created through laser engraving inside the crystal.
Watching this process happen is one of our favorite parts of production.
A blank piece of crystal enters the machine.
A memory comes out.
Step 4: Precision Matters
The positioning of the photograph inside the crystal matters just as much as the photograph itself.
The design has to be properly centered, scaled and aligned for the specific crystal shape selected by the customer.
A portrait inside a Rectangle Crystal may require a different composition from one created for a Heart, Prestige or other crystal style.
This is why every order is treated as a personalized piece rather than a generic product coming off an assembly line.
Step 5: Quality Inspection
Once the 3D laser crystal engraving is complete, the crystal is inspected before it moves forward.
We look closely at:
- Image positioning
- Facial detail
- Engraving clarity
- Crystal condition
- Overall presentation
Because when someone orders a personalized crystal, they’re usually not buying an ordinary decoration.
They’re preserving something important.
That deserves attention.
Step 6: Seeing the Crystal Come to Life
One of the most satisfying moments happens when the finished crystal is placed onto an illuminated LED base.
Light travels through the crystal and highlights the engraved image inside.
Details become more visible.
Depth becomes more dramatic.
And suddenly, the photograph that started on a phone screen feels completely different.
Depending on where you stand, the image can create an impressive sense of dimension as you move around the crystal.
It’s one of the reasons a personalized crystal photo gift feels so different from a traditional printed photograph.
Step 7: Final Preparation and Packaging
After inspection and testing, the crystal is cleaned and prepared for packaging.
We want the experience of opening an ALT 3D Crystal to feel just as special as seeing the engraving itself.
The finished piece is then carefully packaged and prepared for its journey to its new home.
What began as a digital photograph is now a physical keepsake.
Why Use Laser Technology for 3D Crystal Engraving?
There is something special about seeing an image appear within solid crystal.
Unlike a traditional photo frame, the image isn’t simply sitting behind glass.
And unlike conventional surface engraving, the visual effect is created inside the crystal itself.
This allows 3D crystal engraving to combine photography, light and depth in a completely different way.
It can turn an important photograph into:
- A birthday gift
- An anniversary keepsake
- A wedding gift
- A family memory
- A pet tribute
- A memorial crystal
- A graduation gift
- A personalized gift for someone special
The technology is impressive.
But what matters most is what the technology allows us to preserve.
Every Crystal Starts With a Story
Behind the machines, lasers and technology, every ALT 3D Crystal begins with something much simpler:
A memory someone cared enough about to keep.
That’s why we love showing what happens behind the scenes.
You’re not simply uploading another file to a machine.
You’re giving us a photograph that means something to you.
And our job is to transform it into something you can see, display and hold.
Ready to See Your Photo Inside a Crystal?
Choose a meaningful photograph and turn it into your own personalized 3D crystal.
Upload your photo, choose your favorite crystal style and see how your memory can become something extraordinary.